
Making a HUGO Website The Full Stack Way pt 2 - Deploying to Google Cloud
This tutorial is mainly interested for folks deploying their static HUGO site manually to Google Cloud along with a domain name (such as www.mysite.net). There are easier (and highly recommended) options such as Netlify for folks uninterested in managing their own Cloud based website deployment. This tutorial will primarily cover website deployment through the Google Cloud UI. Part 3 of this series will expand upon this and describe how to deploy through Google Cloud using Infrastructure as Code with Terraform.
Steps
- Setup a Google Cloud Account and Service Account
- Create a Google Cloud Storage Bucket with correct permissions
- Register a domain (and confirm ownership) with Cloudflare
- Manually uploading your site to the bucket
Google Cloud Setup
The first thing to do is to sign up for a Google Cloud account and create a new service account.
Getting a service account key
In order to deploy resources to Google Cloud, we need a service account key.
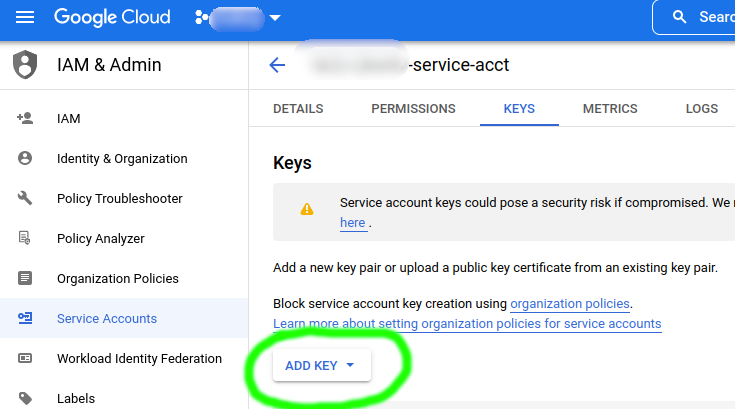
First create a service account under IAM & Admin >> Service Account
A key can be obtained under KEYS
You can save this to your local filesystem to a location like ~/gcp/access_key.json or a location of your choosing.
Remember to reduce permissions on the key file to prevent other accounts on your computer from viewing the contents of the file. In Linux or Mac OSX, this can be done with:
chmod 600 ~/gcp/access_key.json
Creating a Google Cloud Storage Bucket
Go to Console in the upper right hand corner of the Google Cloud UI. Open the Hamburger (three bar) menu in the upper left corner and go to Cloud Storage > Bucket
Hit Create +. There are two settings that are important for your website.
The name of the bucket must be the same as the domain name you are planning to register. That is, if you want to register
mysite.netyou should create a bucket with the namemysite.netWhen creating the bucket, make sure that
Access Controlis set toUniform.
Making the bucket visible on the Internet with IAM Permissions
There are two different ways to make your bucket visible from the public internet. One is called ACL (Access Control Lists) and the other is called IAM (Identity and Access Management). IAM is the most “proper” way to do things and can be used because you set your Access Control to Uniform (meaning all items in the bucket will get managed by the same policy).
Warning: Setting up a bucket to be visible from the internet can be very dangerous for sensitive data. Make sure you NEVER put any sensitive information into a bucket that is setup to be accessible from the internet.
To make the bucket visible from the internet go to your bucket, and under Permissions >> Principals hit +ADD. Add a principal named allUsers and add the role Storage Object Viewer. The allUsers principal is a special category representing everyone.
The permissions should look like:

Registering a domain
There are many different domain registrars such as CloudFlare, Google Domains, NameCheap, and Route 53. I recommend using CloudFlare, but you are free to use whatever registrar suites you. Setting up a DNS zone can be done independently of domain registration.
(Google Cloud) Setting up a DNS Zone
Go to Cloud DNS in the Google Cloud interface and hit +CREATE ZONE. Create a DNS zone like so:

(Cloudflare) Setting up a DNS Zone
Alternatively, you may consider using Cloudflare to manage your DNS in the long run. This has many long-term benefits, mainly in the form of getting free SSL certificates to run your site off of HTTPS.
Instructions: Setting up DNS in Cloudflare for “free” HTTPS
Buying a Domain
After creating a zone, buy a domain through one of the many domain providers (I recommend Cloudflare) and make sure the domain name uses the Nameservers corresponding with your DNS Zone manager.
Create a CNAME record
Go back to Cloud DNS and add CNAME (Canonical Name) record sets. Adding these records will point www subdomains over to your root domain:
These CNAME records should point to c.storage.googleapis.com. The example below shows how this should look in Google Cloud Domains:
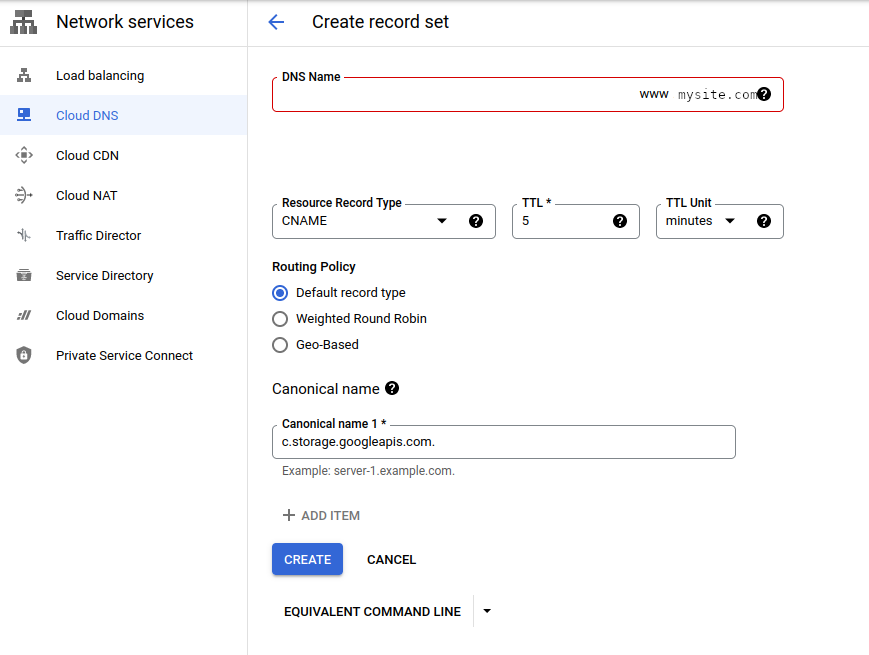
You should create a CNAME record for www and @ (your root domain) pointing to c.storage.googleapis.com
Confirming domain ownership
Confirming domain ownership is a manual process that is highly recommended (and needed for any future Infrastructure as Code tools).
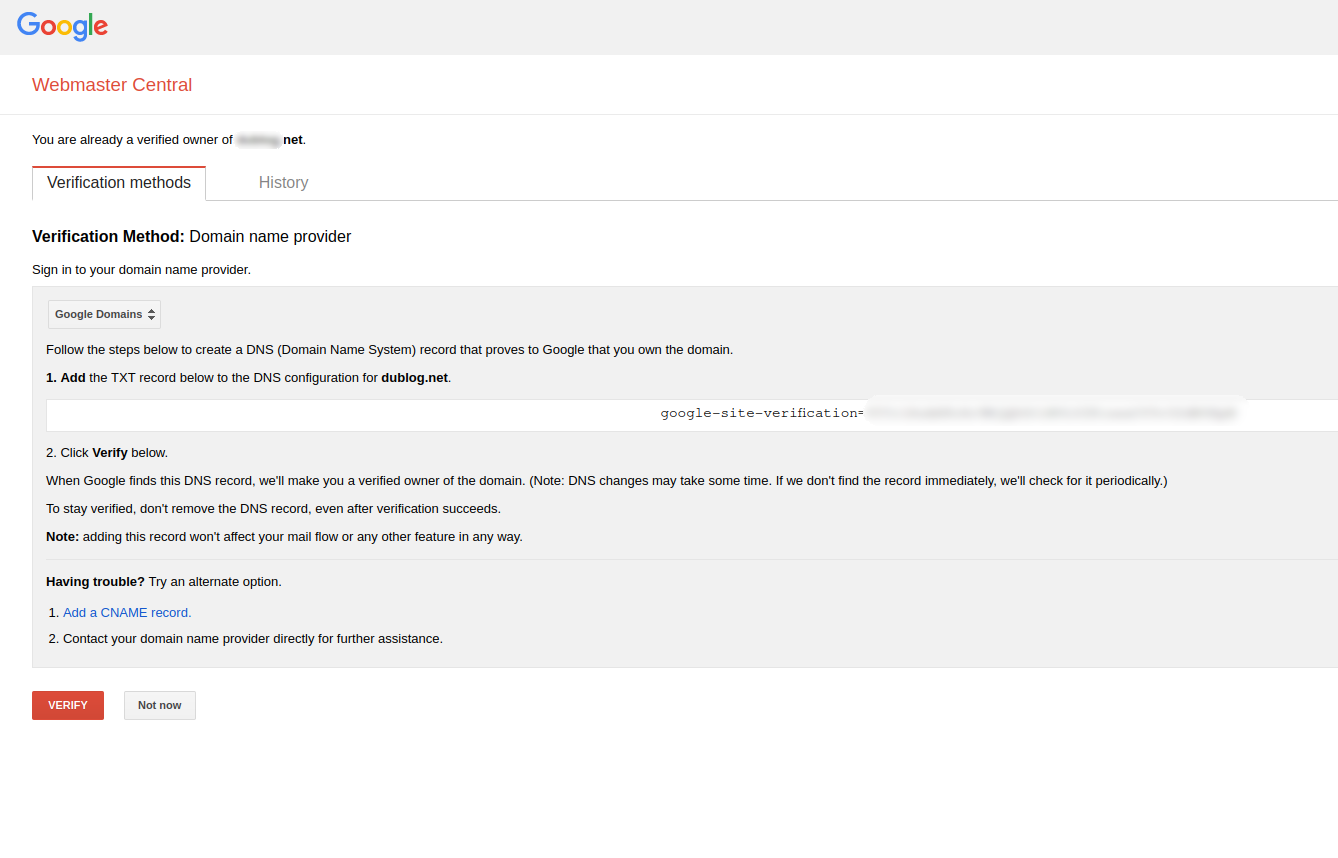
Google may ask you to verify ownership at
https://www.google.com/webmasters/verification/verification?siteUrl=mysite.net
(Replace mysite.net with your domain)
When you get our domain you will need to confirm ownership. There are multiple ways to do it, but for greatest reproducibility, we should confirm by using a TXT record. Select the Verification method that uses TXT records, and add the TXT verification code as a TXT record. If you manage you DNS Zone through Google Cloud this is done through Cloud DNS >> +ADD RECORD SET in the same way you added a CNAME record.
Additionally, you will want to add the service account e-mail to the domain (after confirmation)

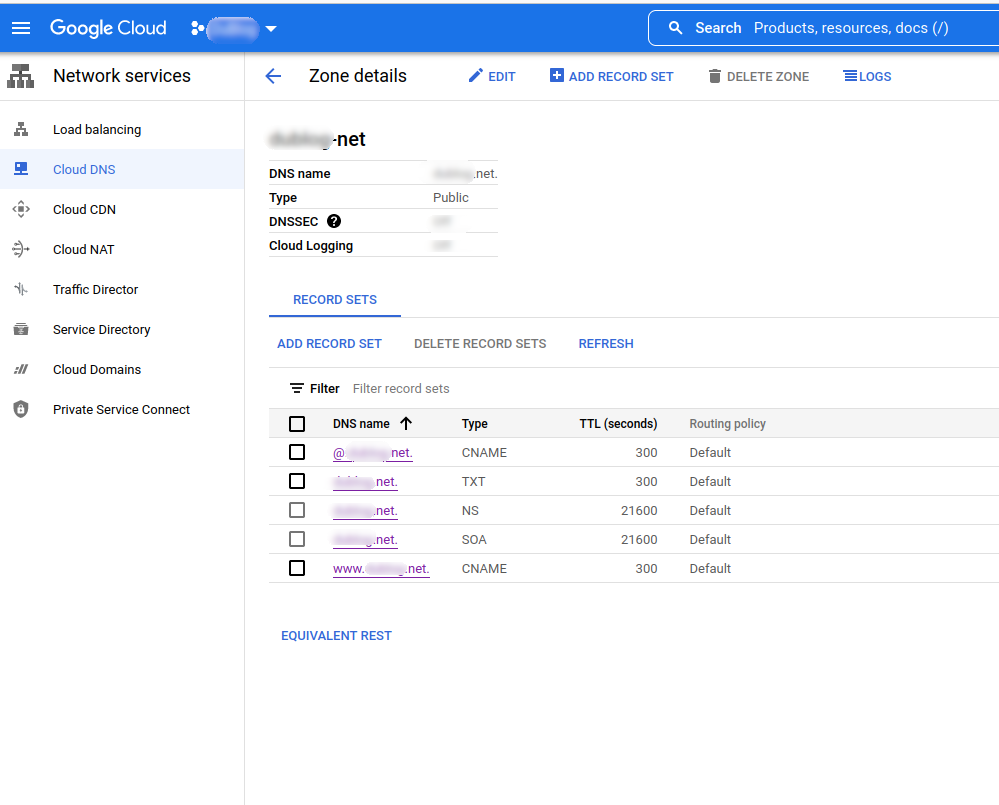
When all is said and done, your DNS Zone settings should look something like this:
Manually uploading your static site to the bucket
Finally, uploading your site to your bucket can be done in two steps.
First update your HUGO config.toml to point to your bucket address
[[deployment.targets]]
name = "mysite"
URL = "gs://mysite.net"
Simply running the following commands will build and deploy to your bucket.
# Build
hugo --gc --minify

# Deploy
hugo deploy --target=mysite
(Optional) Create a Makefile
Manually typing the commands hugo -D server or hugo deploy --target=my_site can get a bit repetitive. Creating a Makefile with the following content can make your life easier:
LOCAL_CREDENTIALS='$(HOME)/gcp/access_keys.json'
DEPLOYMENT_TARGET='my_site'

build:
	hugo --gc --minify

local: build
	hugo -D server

deploy_from_local: build
	GOOGLE_APPLICATION_CREDENTIALS=$(LOCAL_CREDENTIALS) hugo deploy --target=$(DEPLOYMENT_TARGET)
Now simply typing make deploy_from_local will upload your site to the internet.
Next steps - Infrastructure as Code
This tutorial really should be all you need to setup a basic static website and get it hosted online. For the vast majority of people, this is enough to get started for their personal webpages.
For folks more interested in learning more about cloud infrastructure, we will learn more about infrastructure as code in the next tutorial
Read more –> Making a Bucket using Infrastructure As Code Instead
Related Posts

Why Big Tech Wants to Make AI Cost Nothing
Earlier this week, Meta both open sourced and released the model weights for Llama 3.1, an extraordinarily powerful large language model (LLM) which is competitive with the best of what Open AI’s ChatGPT and Anthropic’s Claude can offer.
Read more
Host Your Own CoPilot
GitHub Co-pilot is a fantastic tool. However, it along with some of its other enterprise-grade alternatives such as SourceGraph Cody and Amazon Code Whisperer has a number of rather annoying downsides.
Read more
All the Activation Functions
Recently, I embarked on an informal literature review of the advances in Deep Learning over the past 5 years, and one thing that struck me was the proliferation of activation functions over the past decade.
Read more